Scrapendipity : scrap·en·dip·i·ty

The gift of making fortunate discoveries by accident, a talent for making discoveries while searching for other things.


Showing posts with label Kaisercraft. Show all posts

Wednesday, March 2, 2022

Coming soon Pre-Order, NEW NEW NEW

 IN STORE NEWS !!

MARCH MYSTERY BOXES are being built as we speak and should be ready by Thursday :-)
March coupon starts Tuesday if you purchased the coupon book. ( Die cutting machines, foil press and cricut machines are excluded from this coupon :-)
 *Stop by the store for details and pricing*

Kaiser Coloring Books 'wild animals'  HERE
Kaiser Coloring Books 'Sweet Treats' HERE
Kaiser Coloring Books 'Happy Thoughts'  HERE
Kaiser Coloring Books 'Farm Yard' HERE
Kaiser Coloring Books 'Faraway Kingdom' HERE
 Kaiser Coloring Books 'Words to Inspire' HERE
 
Kaiser Coloring Books 'Desert Nights' HERE
 
Kaiser Coloring Books 'Furry Friends'  HERE
 Kaiser Coloring Books 'Hidden Forest' HERE
Kaiser Coloring Books 'Count Your Blessings' HERE
Kaiser Coloring Books 'Stardust Sparkles' HERE
12 x 12 Tiny Miracle paper pack HERE
6 x 6 Tiny Miracle paper pack HERE
Tiny Miracle Collectables HERE
Garden Villa 12 x 12 with bonus stickers HERE
6.5 x 6.5 Garden Villa paper pack HERE
Garden Villa Collectables pack HERE
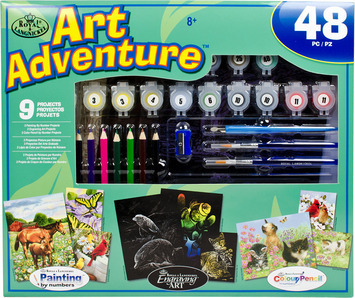

Art Adventure Set '9' HERE
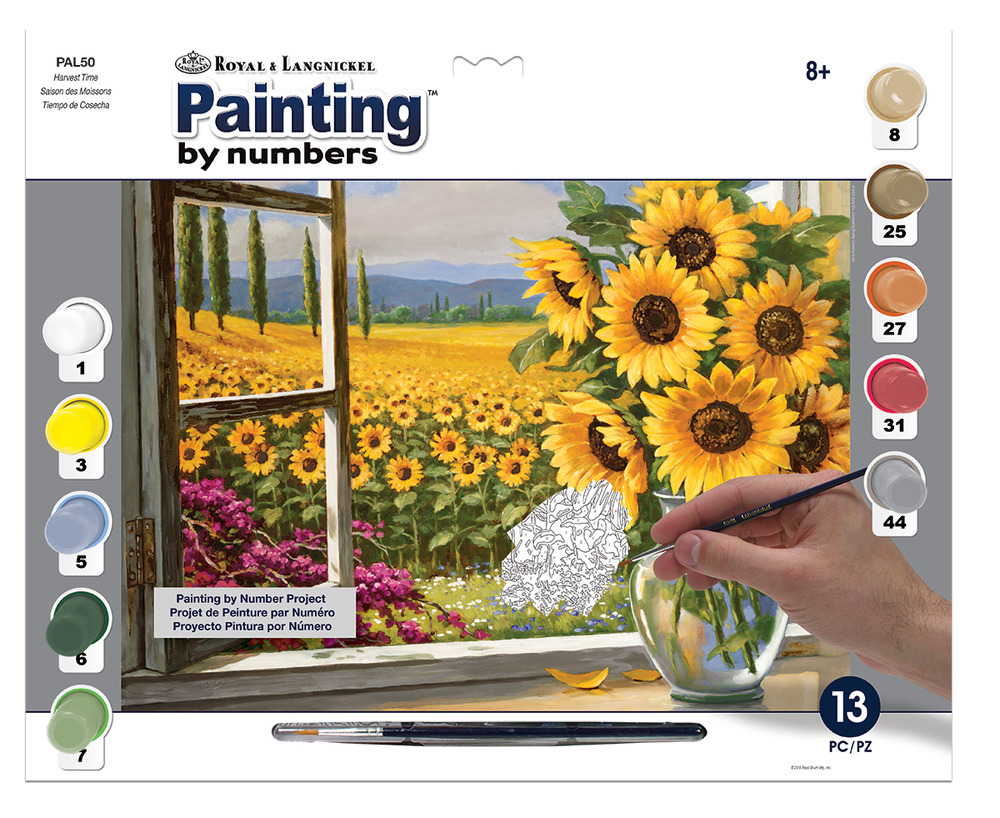
Adult Paint by Number 'Cottage'  HERE
Adult Paint by Number 'Large Harvest' HERE
See More Adult Paint by Number HERE

NOTE: We have a huge in store selection
 for immediate sales, as well as unique items available in store only.  When you are shopping our online store, please allow 3-4 business days for your order to be shipped from the warehouse for in store pickup or delivery by mail.  As indicated in the online catalogue, some items may be  pre ordered*, with an approximate delivery date, or out of stock*.

Click on HERE to shop online today!!

NEW SOUTH CALGARY STORE  NOW OPEN
#22 -9250 Macleod trail SE 
Phone 403 457 7790
SOUTH STORE


NORTH STORE
208 3400 14Th st NW
Calgary Alberta
T2K 1H9
Phone 403-455-6772
 (facing Chelsea St) Calgary, Alberta

See google directions HERE

Wednesday, December 12, 2018

Deep Sea Kit 'card2' with Debie Selby

 
Hello, it is Debbie with the final blog post featuring the Deep Sea Collection available at Scrapendipity.

Today I am doing an assessment card.  What does that mean?  It means I assessed what I still had left in the kit and about how it could work together.
~First thing I did was pick up a piece of ephemera and wondered what it was.  I realized eventually that it was a mermaid’s tail.
~ I remembered that I had seen a wonderful quote about mermaids printed on the margin of one of the papers. Check.
~ I had only used one teeny rhinestone to date. Check.
~ I hadn't yet used any of the wooden embellishments. Check.
~There were plenty of ephemera pieces left and a ton of paper. Check.
~ The piece de la resistance was the Mermaid Scales foiled paper. 
~I had my card for today.  The mermaid’s tail was outlined with the rhinestones.
 I am not going to lie to you………..this took a while to get lined up the way I wanted.  By the time, I finally did get them on, I was concerned about the amount of stick I had left on them.    Then I had an idea.  I covered the tail with Wink of Stella and then coated the tail in Nuvo Glaze allowing it to run into the rhinestones lining the edge of the tail.  Hopefully, that will keep the rhinestones where they belong.
 I arranged the ephemera and wooden embellishments as shown on the card,  and mounted them on a piece of fun foam (not included) for dimension.  I cut up the sentiment so that it would fit on the card as shown.

There is still plenty of stuff left in the kit.  I could recreate most of what I have made using different papers, the sticker sheet, and left-over rhinestones.  This is a fabulous kit and it works for many different occasions and locations.


Sunday, December 9, 2018

Deep Sea Kit 'card' with Debie Selby

 
Hello, Debbie here with the next project using the contents of the Deep Sea Collection kit available at Scrapendipity.
 
Today, I am switching from layouts and on to making a card from the kit.  Included in the kit is a great stamp set featuring turtles and shells.  I picked out a piece of paper from the kit that looked like water but wasn't too dark as I wanted to colour right over the background paper for a one-layer card.  I used Gina K Amalgam ink as it can be used for both water colouring and alcohol ink-based projects without smearing.  The trick with this project is to use a stamp positioner and leave the stamps where they are after stamping. I decided to use pencil crayons and Gamsol to colour the images.  After the colouring was complete, I put the image back in the positioner.  I liberally patted the image with an embossing buddy and then stamped it as before using Versamark ink.  I added clear embossing powder and heat set it.
  The image literally came alive with this treatment.  I white heat embossed the sentiment from the stamp set on a piece of black cardstock and attached it with foam tape for dimension.  Finally, I added tiny bubbles from my stash, but the same effect could be achieved using the small rhinestones that are included in the kit.
 
Have I used everything in the kit?  Not even close.  Watch for my next post where the rhinestones and wooden embellishments get a workout.  Stay tuned!

Friday, December 7, 2018

Deep Sea Collection Kit 2 with Debbie Selby

 
Hello, Debbie here with my second layout made from the contents of the 'Deep Sea Kit' available at Scrapendipity.

This time I wanted to use some of the other elements included in the kit.  There is a marvelous stencil of some turtles and a piece of seaweed included in the kit.  I decided to use Ranger Texture paste (not included)with the stencil, but you could also choose to use inks or sprays.  Distress re-inkers work very well to give the normally white paste brilliant colour and that is what I used to make the turtles green (lucky clover) and the seaweed blue green(peacock feathers).
Please use any of these, if it shows the technique/embellishments better
  I wanted to give the layout more of a mixed media look, so I sprayed a couple of different Prima mica sprays from my stash (Emerald and Glistening Waves) along with splattering some white acrylic ink on the background before adding the rest of the elements. The sprays are not included and not necessary as the paper is lovely all by itself, but I just like the spattered look.  I find that both the sprays and the texture paste  buckled the background paper a bit.  I flattened it,  by taping it to a 120# white piece of cardstock with copious amounts of wide Scor tape (not necessary and not included but I detest paper with ripples, so I did it)  I  framed the picture with one of the darker papers and adhered it to a narrow strip of the fan coral paper.  I arranged the ephemera pieces, shell and bubble diecut as shown on the layout. 
I added Nuvo glaze to the Wild and Free sentiment and a few other pieces for shine and dimension.  I added a rhinestone to the anchor and finally made the biggest Nuvo (Morning Dew) bubbles ever, over the ephemera bubbles and called it done.

Next Post Sunday!

Wednesday, December 5, 2018

Deep Sea Kit with Debbie Selby


Hello, Debbie on the blog today.  Scrapendipity has made up some incredible kits using Kaisercraft's Deep Sea Collection.  I confess that often it takes me hours to review and pull out what I want to use for a layout before I can even get started on the layout itself.  That did not happen with this wonderful kit.  It has so many fantastic elements, that I really didn't have to dig for anything else.

I decided to cut the wonderful varnished clam shell paper in half to basically frame the scene of the two-page layout.  I had pictures of Bora Bora where the beautiful aqua water was the star of the show, but I didn't want it to become Boring Boring on the page.  I loved the bubbles die cuts that are included in the kit and so I decided to use them as frames for our snorkeling pictures.
 There are enough coral reef/sea weed diecuts in the kit to form the ocean floor.  Included also are some lovely seashell diecuts.  The sand bottom was just hand cut with a light beige cardstock and adhered to the bottom of the layout pages.  Although it isn't necessary and is not included in the kit, I added some Dirty Sand embossing powder from Emerald Creek to the sand bottom.  The smaller turtle diecuts which are also included, have an open shell.  I decided to attach a hand cut piece of dark green cardstock to the back of the turtle shell, just so they would show up a bit more against the busy background paper.
 The larger turtle diecut is also included and has an open design shell.  Once again, I hand cut and glued a piece of dark green cardstock behind the open shell.  I wanted some more texture, so I filled the hexagons on the large turtle’s back with Nuvo Crystal Glaze.  The Bora Bora title and year diecuts were cut on my electronic cutter and are not included.  I will make an exception and include the titles in the kit, if you are going to Bora Bora and you agree to take me with you.  I edged all the diecuts with ink and a sponge dauber to give them some extra definition. Finally, I added a bit more dimension by putting Nuvo Crystal Drops (Morning Dew) as water droplets on the bubbles frames.

The contents of this kit are simply amazing.  Today I used just some of the paper, diecuts and cardstock.  My future posts will use more diecuts, paper, stencil, wooden embellishments, ephemera, bling and a stamp set which are all in the kit.

 See in Store to buy this kit, and check back Friday for more layouts
 

Friday, May 12, 2017

May Kit Blitz 'Wildflower' with Holly

 New kit of the month
WILDFLOWER is available in store and online now.
 Check out the wonderful things Holly is working on with this beautiful kit.
                                              
My first entry is a two page layout
I used the two "fleur" pages from the kit and the two pink cardstock
I trimmed the "fleur" paper to 11x11 and used the backside of the 1" strip
to add to the outside edges of both pages.
Use a piece of the "flowering" paper to accent the matted photos.
Use Tim Holtz peeled paint ink and the stencil to add a base for the flowers
beside the photo mats.  I also used this ink to color the work beautiful (found
in the collections pack)
Next I created 3 flowers from the Heartfelt enchanted mum stamp and die and
added them over the green ink. (cutouts of the stamp and die are available at the store.)

Add a gem flourish and fussy cut one of the dragonflies ink it with the same
green and add it to the page.wildflower kit


Friday, March 17, 2017

Fun Friday with Pam

Happy St. Patrick's Day
 
More Island Escape!
I am at 10 pages on this kit, and still have more to work with. Seriously terrific value in Selena's kits!
These poor little peacock's at the resort were the saddest I have ever seen. 
They had very few of their signature feathers left. I am not sure if that was done on purpose, to stop the tourists molesting them, or if they were clipped, or if they were sick. It did seem too evenly done to be an accident.
NOTE: The photos of the peacocks had very busy backgrounds. So, I decided to fussy cut them to highlight the birds better.
I decided to beef up the sand image in on the paper with:
Use a dauber to swipe large areas, alternate with TH Distress sandy powders and a heat gun.
For this layout, I 'PPG' the inside of the emboss basket weave. It can be difficult to scrapbook busy, colorful flower photo's. I cut mine into 3 x 3 inch squares to form one solid 6 x 6 display. Then re-matted the one I wanted to highlight. 'The Hibiscus' of course!
 
Tips for this one:
I used the word strip to form the journaling. First thing I did was secure it to a thin piece of double sided tape. That way, it is fast to cut and glue to the journal card. The jangles along the lower edge is beaded ribbon from the stash. with Washi tape over the ribbon.
Close-up of the journal grouping and finishing details.
 
Flamingos
This layout was done with two sheets, a lot of cut, flip, flop, and paste.
Cuba has a large flamingo sanctuary inland of the coast of 'Cao Coco' island chains. It is a HUGE no-no to kill a pinky!