Scrapendipity : scrap·en·dip·i·ty

The gift of making fortunate discoveries by accident, a talent for making discoveries while searching for other things.


Monday, February 29, 2016

Make and Take with Holly March 3

Happy Monday my crafty friends. 
 This weeks make and take is full of fun technique.
  We will do some colouring, inking and die cutting,
 to create an all occasion card.
Please email hollyth@shaw.ca to sign up for
10:00am 11:00am noon 2:00pm 3:00pm 4:00pm or 5:00pm.
Remember your adhesives and if you have tombow markers 528 and 126 please bring them along.  Also we will be using Tim's salty ocean distress ink.

Wednesday, February 24, 2016

NEW NEW NEW in store

NEW STAMPENDOUS
Owl Clock HERE
Fairy Aviary HERE
Wood Background HERE
In a Hurry Hare HERE
Nosey Cat HERE
Gift Drift HERE
Shabby Chic HERE
Cat Lady HERE
TH Collage brush Here
Picket Fence HERE
View TH Mini Ink Selection HERE
Mixed Media Pallet HERE
Mini Stencil #1 HERE
Mini Stencil #2 HERE
Mini Stencil #3 HERE
Mini Stencil #4 HERE
Mini Stencil #5 HERE
 Check out this video of All Tim Holtz newest products.

Tuesday, February 23, 2016

Distress Crayon Tutorial!

Karla here today, and since I picked up the Most Awesome Distress Crayons from Selena's truck last week I just had to share how I made this card with them!


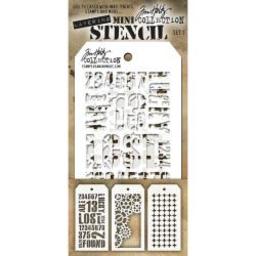
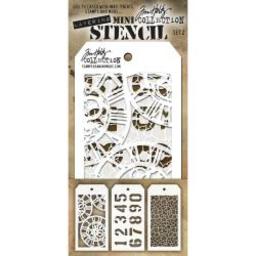
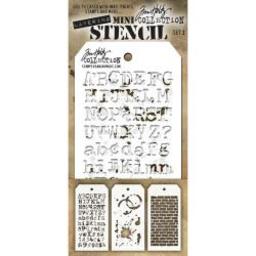
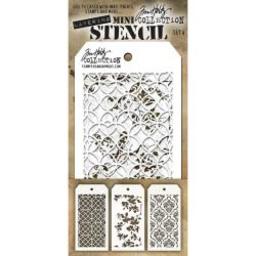
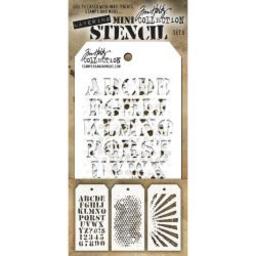
I started off by taking a piece of Specialty Stamping paper, which is a little glossy and helped me move the crayons around a bit, but you could use a piece of white cardstock as well. I found some Heidi Swapp stencils, and for the polka dots and hexagons I rubbed the crayon directly through the stencil. I rubbed a bit of the other crayons on the white areas and smudged it with my finger. Then, I took a baby wipe and wiped through the stencils to create a negative effect.

I used one of the crayons to edge around the piece of cardstock and then gently smudged it with my finger to blend it around the edge. I used my new Hero Arts Neon Ombre ink pad to stamp on these Tim Holtz butterflies and then embossed them with clear Crystal embossing powder, which has a bit of shimmer in it. Another Tim Holtz sentiment stamp added detail to the front of the my piece, stamped in grey Archival Ink.

 Here's a close up of the finished piece. I added a bit of Pink Distress Marker inside the butterflies and a couple pink flowers at the bottom. I used the Distress Crayons to add colour to my seam binding ribbon, which Selena can get in by the roll! This is really my favourite ribbon. After rubbing it on I sprayed it with water and then rubbed it with my finger to blend it. The crayons don't automatically blend with water like the inks, but do blend when you manipulate them.

Thank you so much for joining me today! Have a fun and crafty week!


Monday, February 22, 2016

Card Class with Dianne March 8

The New Lily collection by Heartfelt Creations has arrived!!!
Come learn the beauty and simplicity of these flowers,
step by step to create 3D cards!
Dianne will be making 3 cards all with lots of layers and embellishments!

DATE: Tuesday, March 8
10:30 or 6:30
COST: $30 for 3 cards
Please email Dianne if you can come!

Card class with Dianne March 15

Dianne will be teaching us some great coloring techniques with Tombows coloring these very fun and vivacious women! Each card has an option of many different sayings she will provide!

DATE: Tuesday, March 15
10:30 or 6:30

COST: $30 for 4 cards
Email diannemahura@hotmail to save your spot!

Make and Take with Holly February 25


Happy Monday everyone. 
For this weeks make and take we will be inking on vellum
to create this bright floral card that reminds us
that spring is on the way.
Email hollyth@shaw.ca to sign up for:
 10:00am 11:00am 12:00noon 2:00pm 3:00pm 4:00pm 5:00pm or 5:30pm.
We meet at Thorncliff Community Center. 
 The cost is $5 for one card $7 for two.
Please remember your adhesive and a travel mug.

Coffee Talk Card Class with Holly March 22


In this class we will use the heartfelt creations
 "coffee talk" paper and stamps and dies.
Everyone will receive half a 12X12 pack of paper
so there will be lots of paper left to create
 lots more cards at home. 
In this class you will learn a few fun folds
 including the pop up gift card holder.
The class will be held on
March 22 6:00pm. 
Cost $35.00
Please email hollyth@shaw.ca to sign up for this class

Wednesday, February 17, 2016

NEW from CHA

Check out the latest arrivals from CHA
Angel fish Brads HERE
Butterfly Brads HERE
Roller Snowflake  HERE
Roller Ticket HERE'
Roller Film Strip HERE
Roller Stamp Flags HERE
Stamp Roller Applicator HERE
Fallen Blossoms HERE
Upstream Stamp HERE
Circle Stax Die HERE
World of Adventure paper pack HERE
Wedding Day paper pack HERE
 See more beautiful Reminisce paper packs HERE 
 
Page kits are back - Kaiser once again has come out with a beautiful summer beach line. Page kits available while they last. $37.00 and filled with goodies!
 
http://scrapendipity.lightspeedwebstore.com/

Tuesday, February 16, 2016

The Wonder Years Scrapbook Layout!

Hi there friends! Karla here today to share a layout I made using some new and old supplies. I recently picked up some My Minds Eye Jubilee papers and coordinating stickers and thought they'd be perfect to use on this layout with photos from our summer 2013 camping trip.

I wanted to mix my old scrapbooking stash with some new favourites and when I looked at the sketch (below) that I followed for this page, the triangles reminded me of the Heidi Swapp stencil I have had in my stash for a while. I pulled out some Texture Paste to go along with it. I love being able to use my mixed media supplies I have had for awhile and mix them with my paper supplies on my layouts.


Another oldie supply in my stash was this striped pink paper that I'm trying to use up! The stripes made a perfect lined journaling card I formed into a tag and tucked behind my photo. I used my 123 We R Memory Keepers Punch Board to create the file folder tab at the top and stamped it with a SMASH date stamp that's been in my stash for quite some time too!

I love this fun flair badge!

The Wonder Years title was part of a chipboard sticker page that coordinates with the papers and I found a little chipboard bike to add to my page.

Here's a look at the sketch, which you can find on Pinterest:

Thanks so much for stopping by today! I had a lovely long weekend and I spent yesterday doing lots of scrapbooking! I hope you enjoyed your weekend too :)


Monday, February 15, 2016

Make and Take with Holly February 18


Good morning, hope everyone is enjoying "Family Day". 
  Come out to the Thorncliff Community Center this Thursday
 for our weekly make and take. 
This week we will make a shape card using the die from the new "Coffee Talk" collection from heartfelt creations. 
I LOVE this whole collection, dies, stamps and paper.
If you have faded jeans and vintage photo distress pens and ink please bring them with you to help speed things up.
Email hollyth@shaw.ca to sign up for 10:00am 11:00am 12:00noon 2:00pm 3:00pm 4:00pm 5:00pm or 5:30pm.
Please remember your adhesive and a travel mug for coffee.
The cost is $5 for one card or $7 for two.